
前言
在国内,搭建一个对公网开放的网站从来都不简单:
1、你可能没有公网 IP
2、哪怕你有公网 IP,但是 80 和 443 的网站核心端口默认被封
但今天要讲的方案,只需要一台能本地能上网的 VPS 或本地服务器,就能用 Cloudflare 的隧道服务,把你的网站发布到全球,并且使用国际域名,和普通的网站看起来没有任何区别!
准备工作
1、国际域名一个
2、注册 CloudFlare,并把域名托管在上面
3、SSH 连接工具
PVE 设置
SSH连接PVE替换容器模版为清华源
perl -i -pe 's|url\s*=>\s*".*?"|url => "https://mirrors.tuna.tsinghua.edu.cn/proxmox/images"| if $in_block; $in_block = 1 if /host\s*=>\s*"download\.proxmox\.com"/; $in_block = 0 if /\}/' /usr/share/perl5/PVE/APLInfo.pm && pveam update
创建 CT 虚拟机
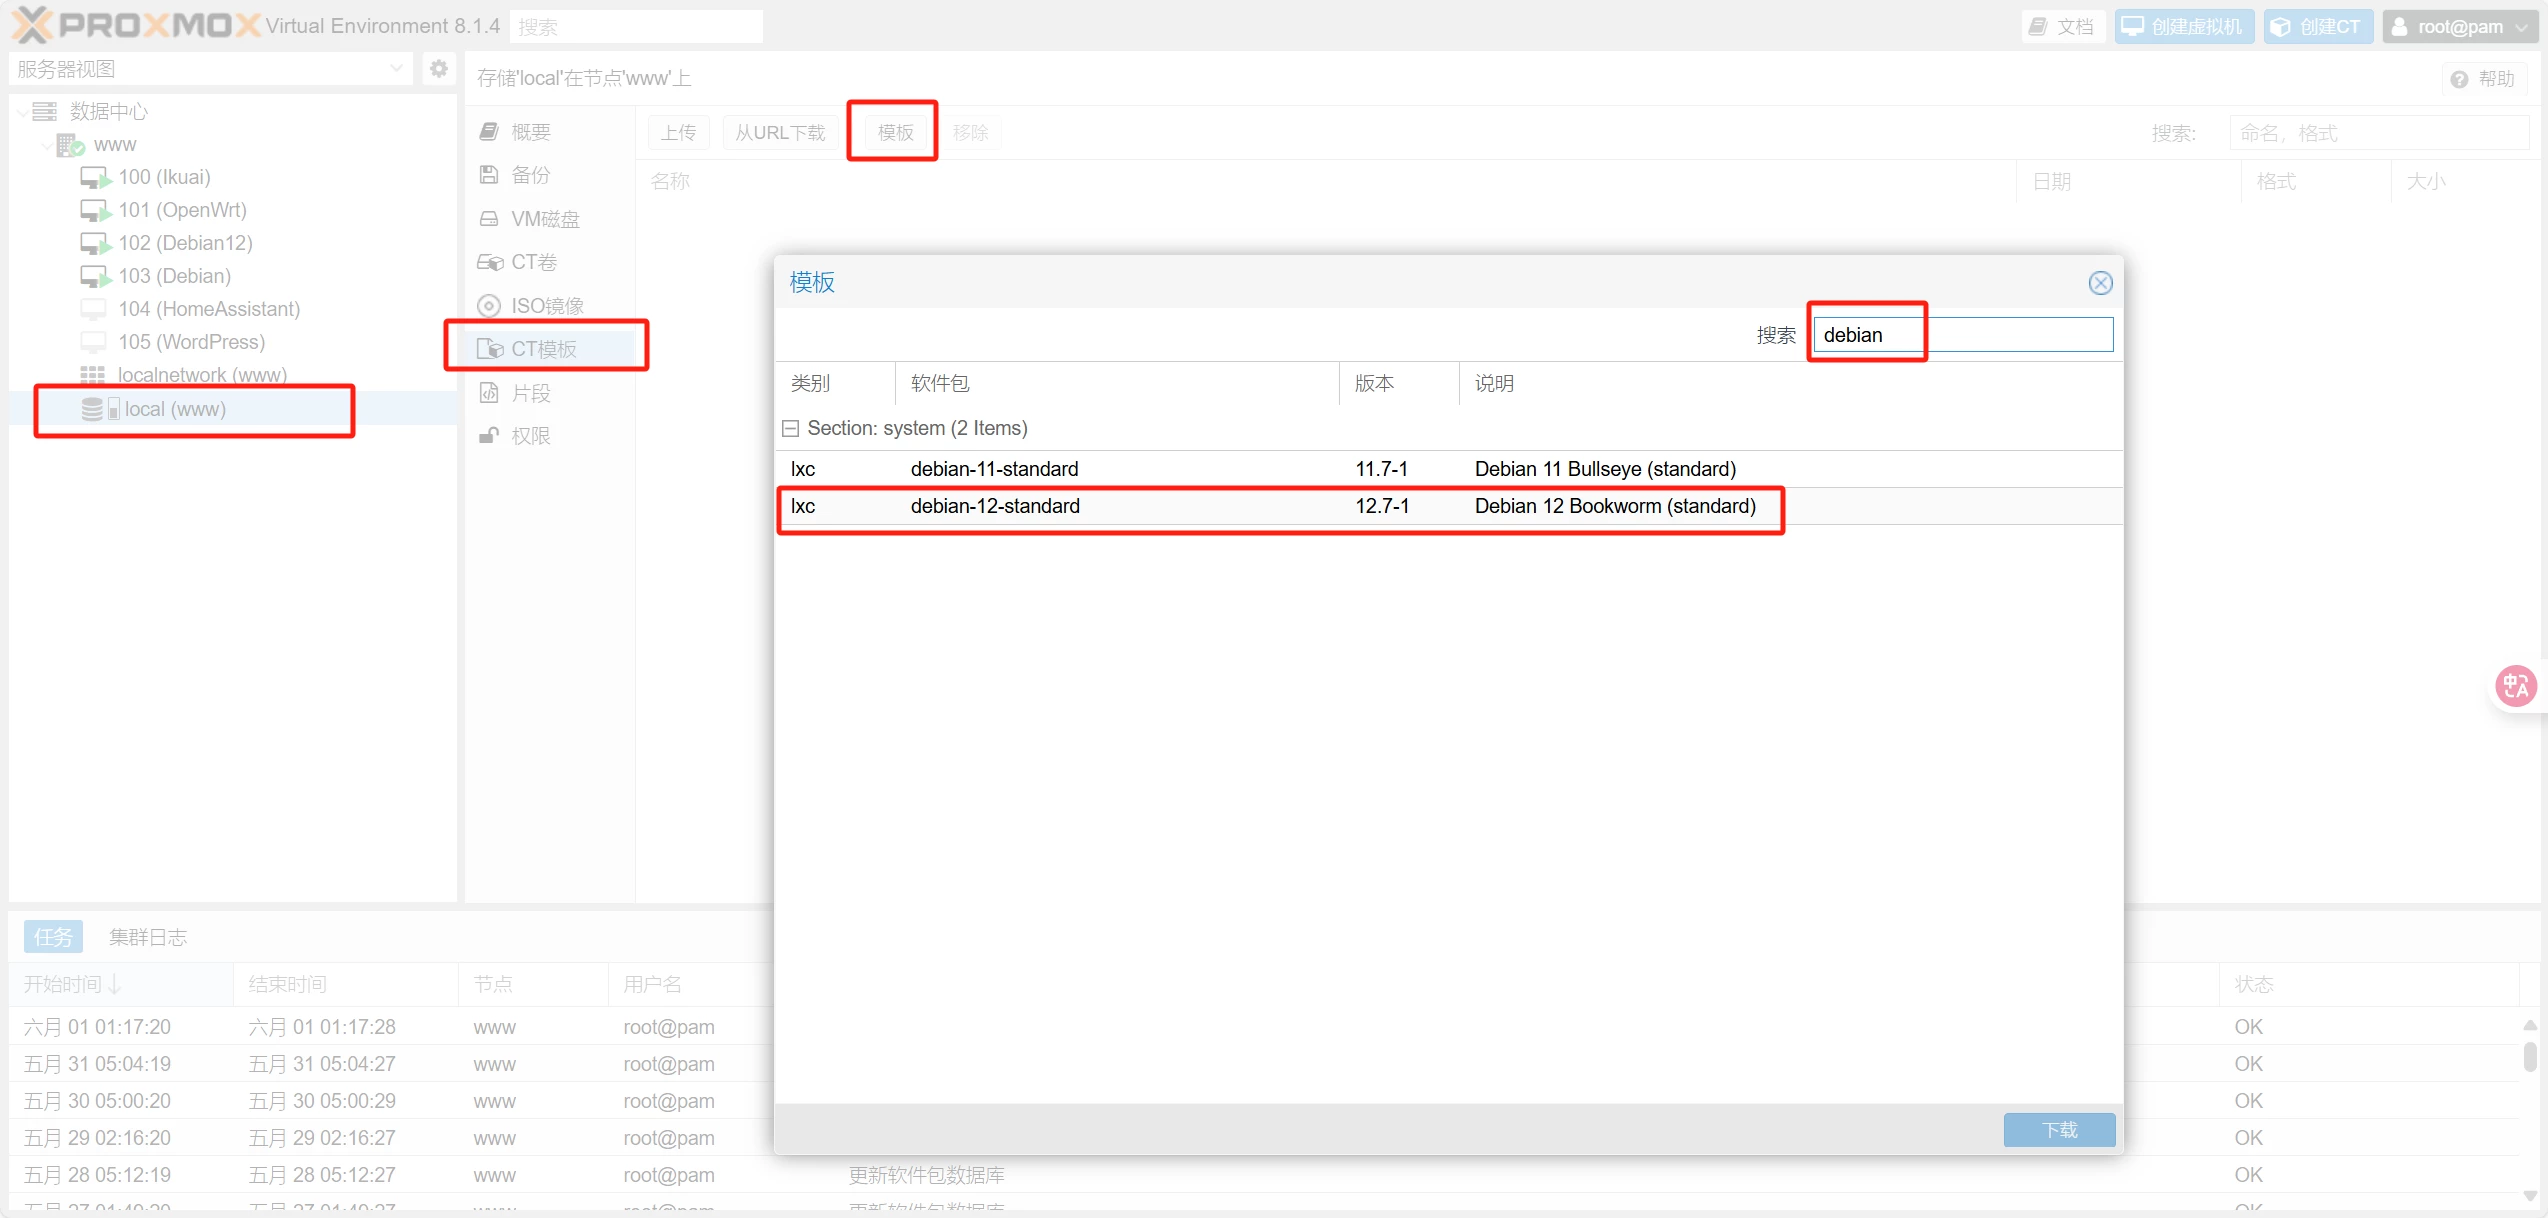
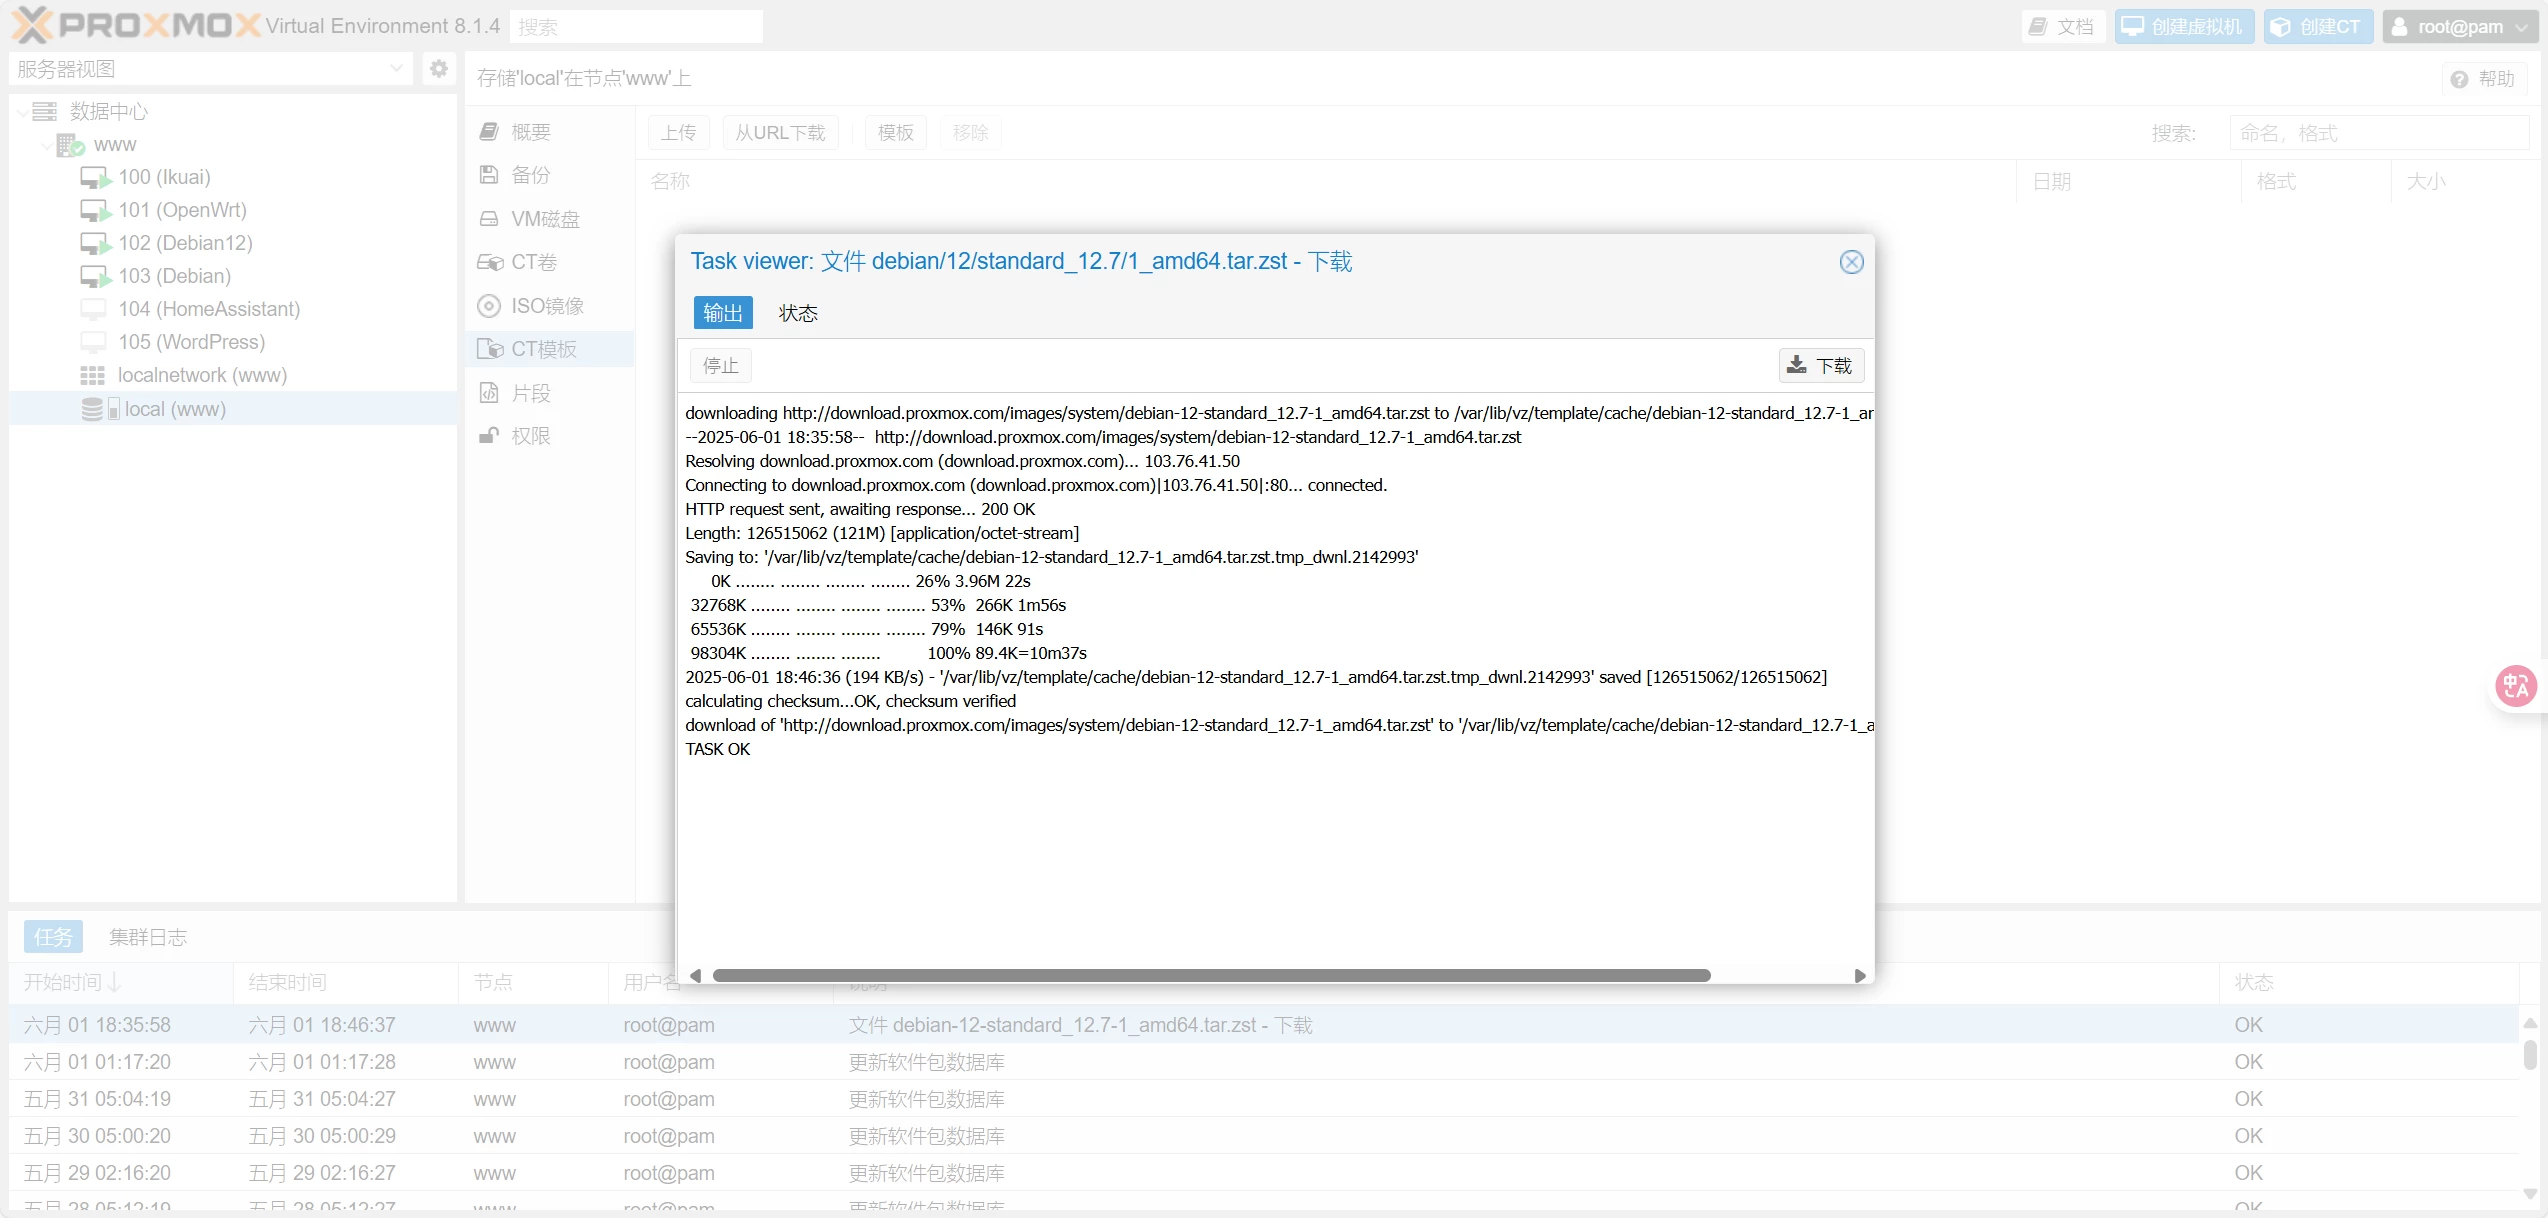
下载debian12
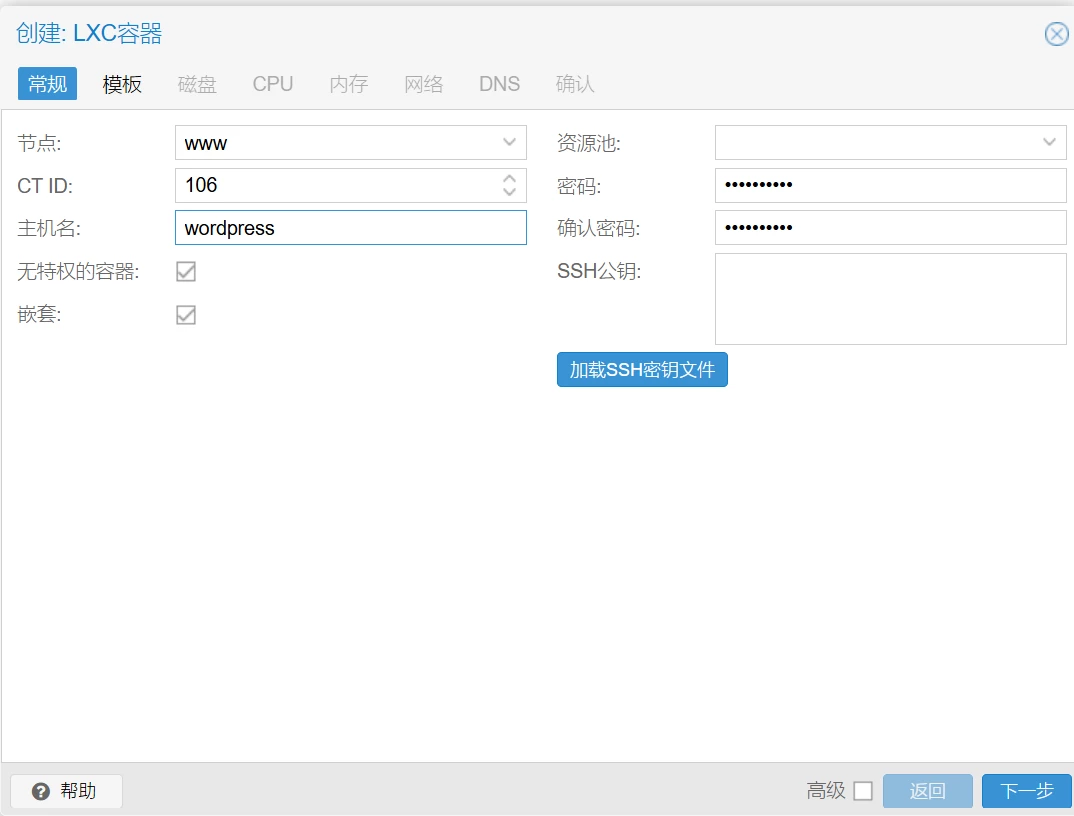
 创建CT
创建CT
设置主机名和密码
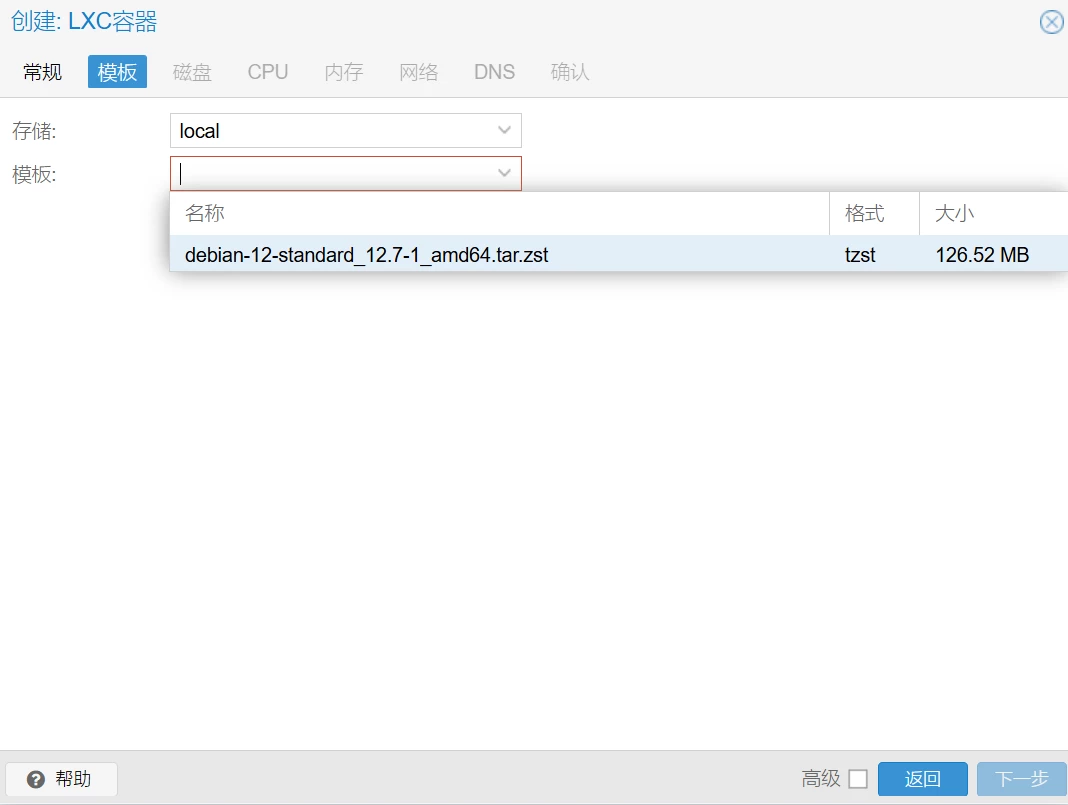
模板选下载的debian12
磁盘大小根据自己需求填写

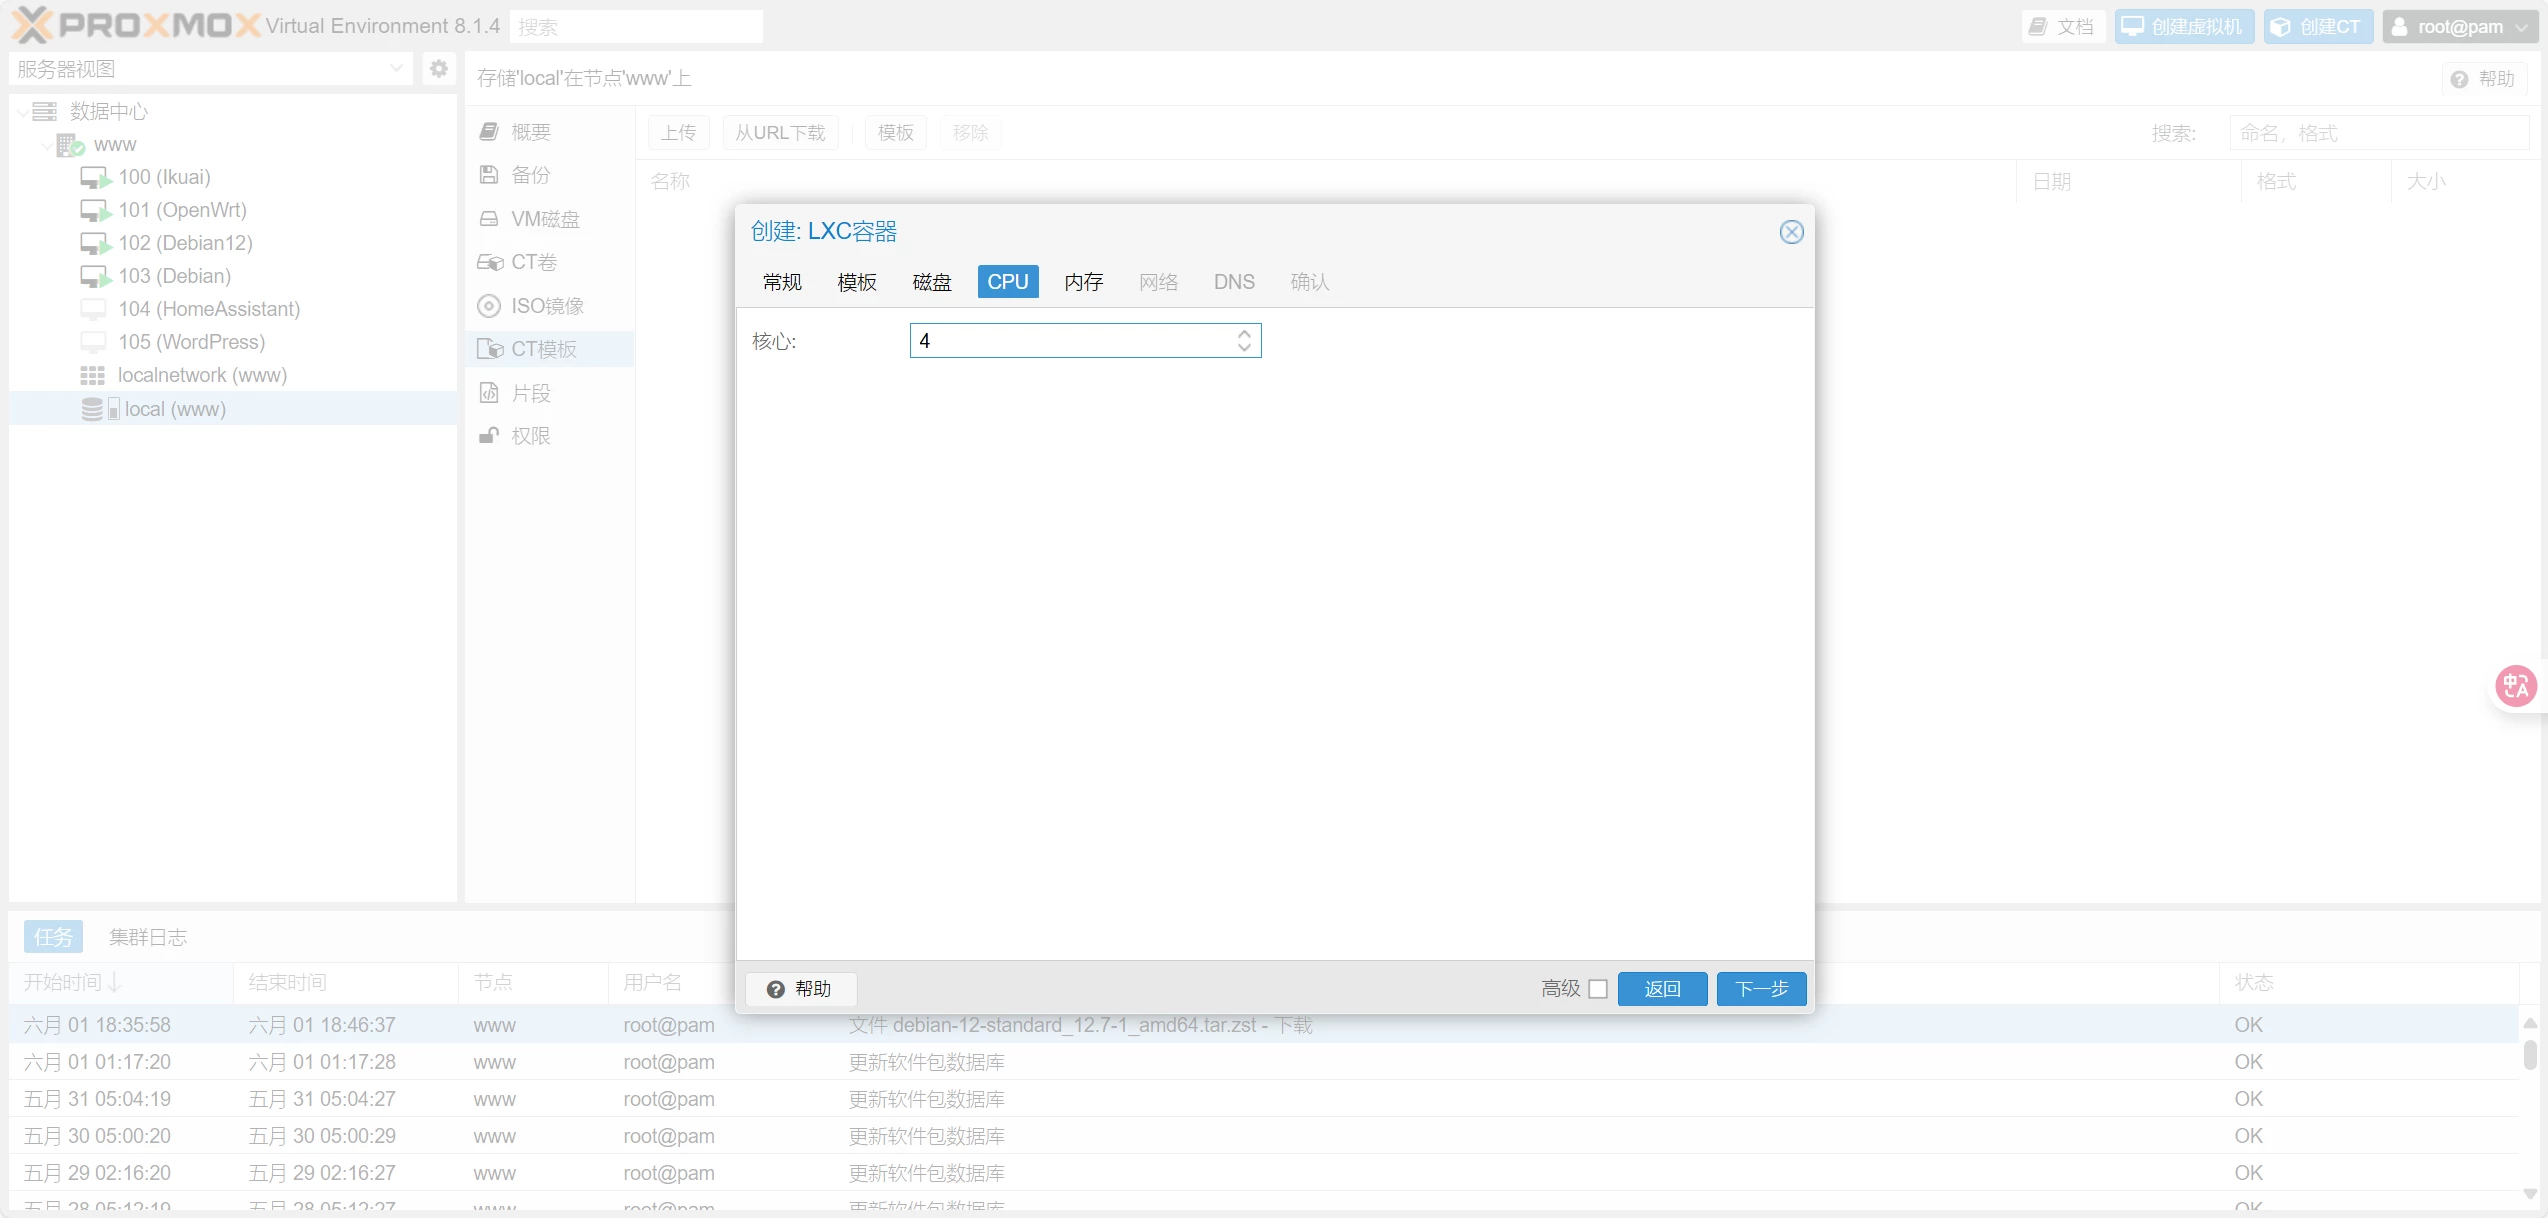
CPU根据自己需求填写
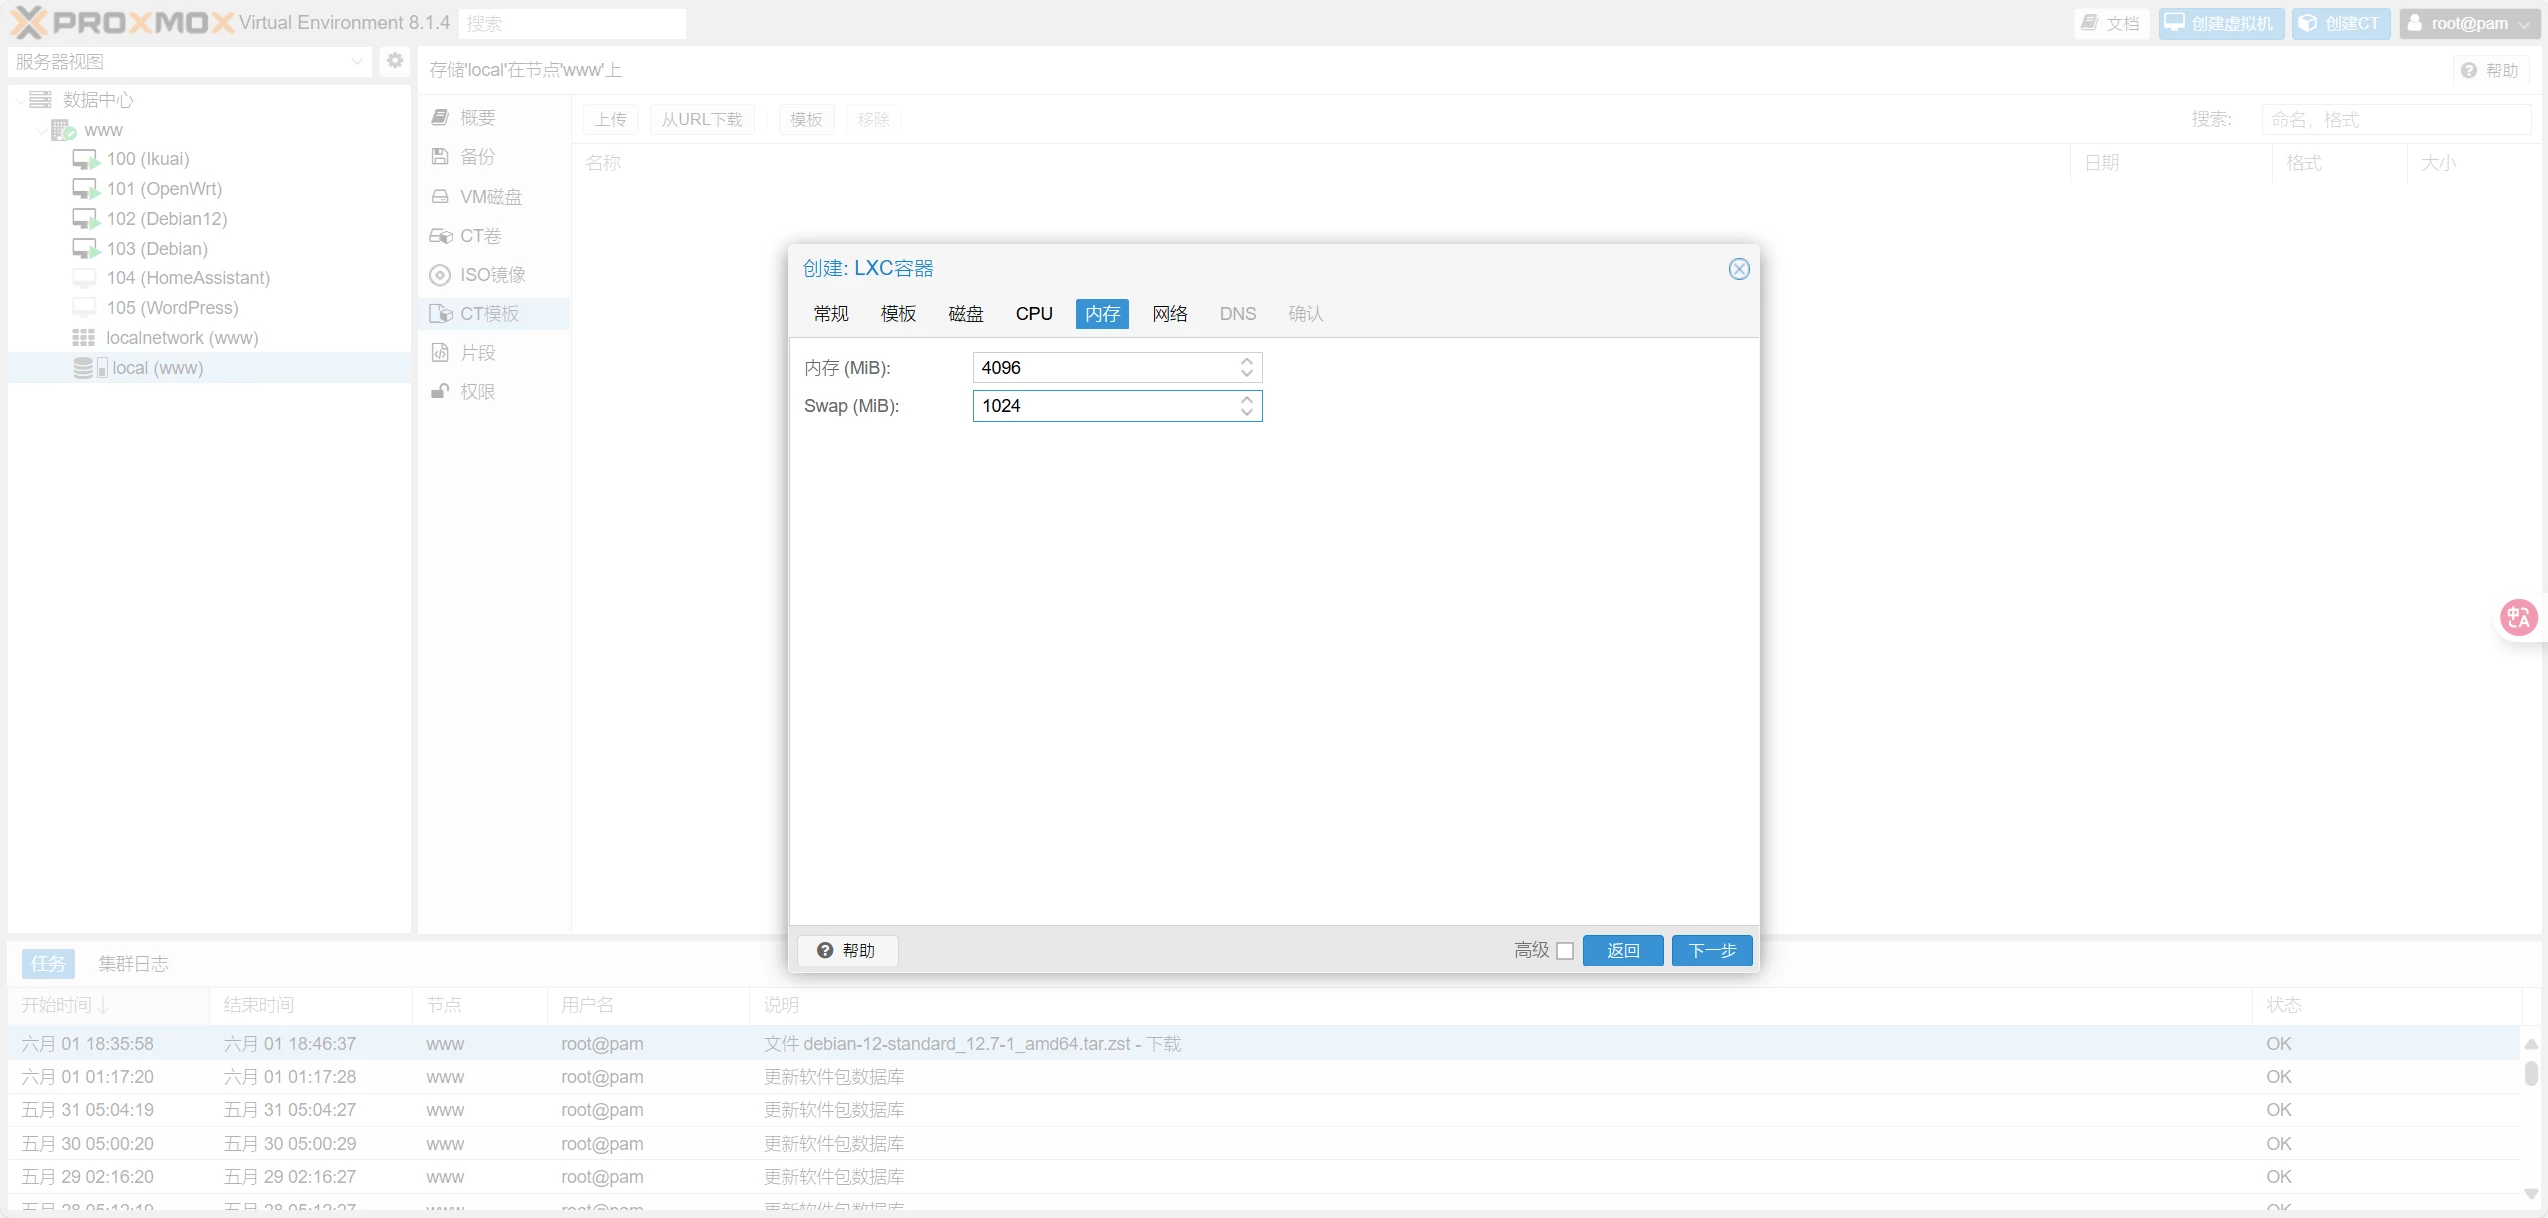
内存根据自己需求填写
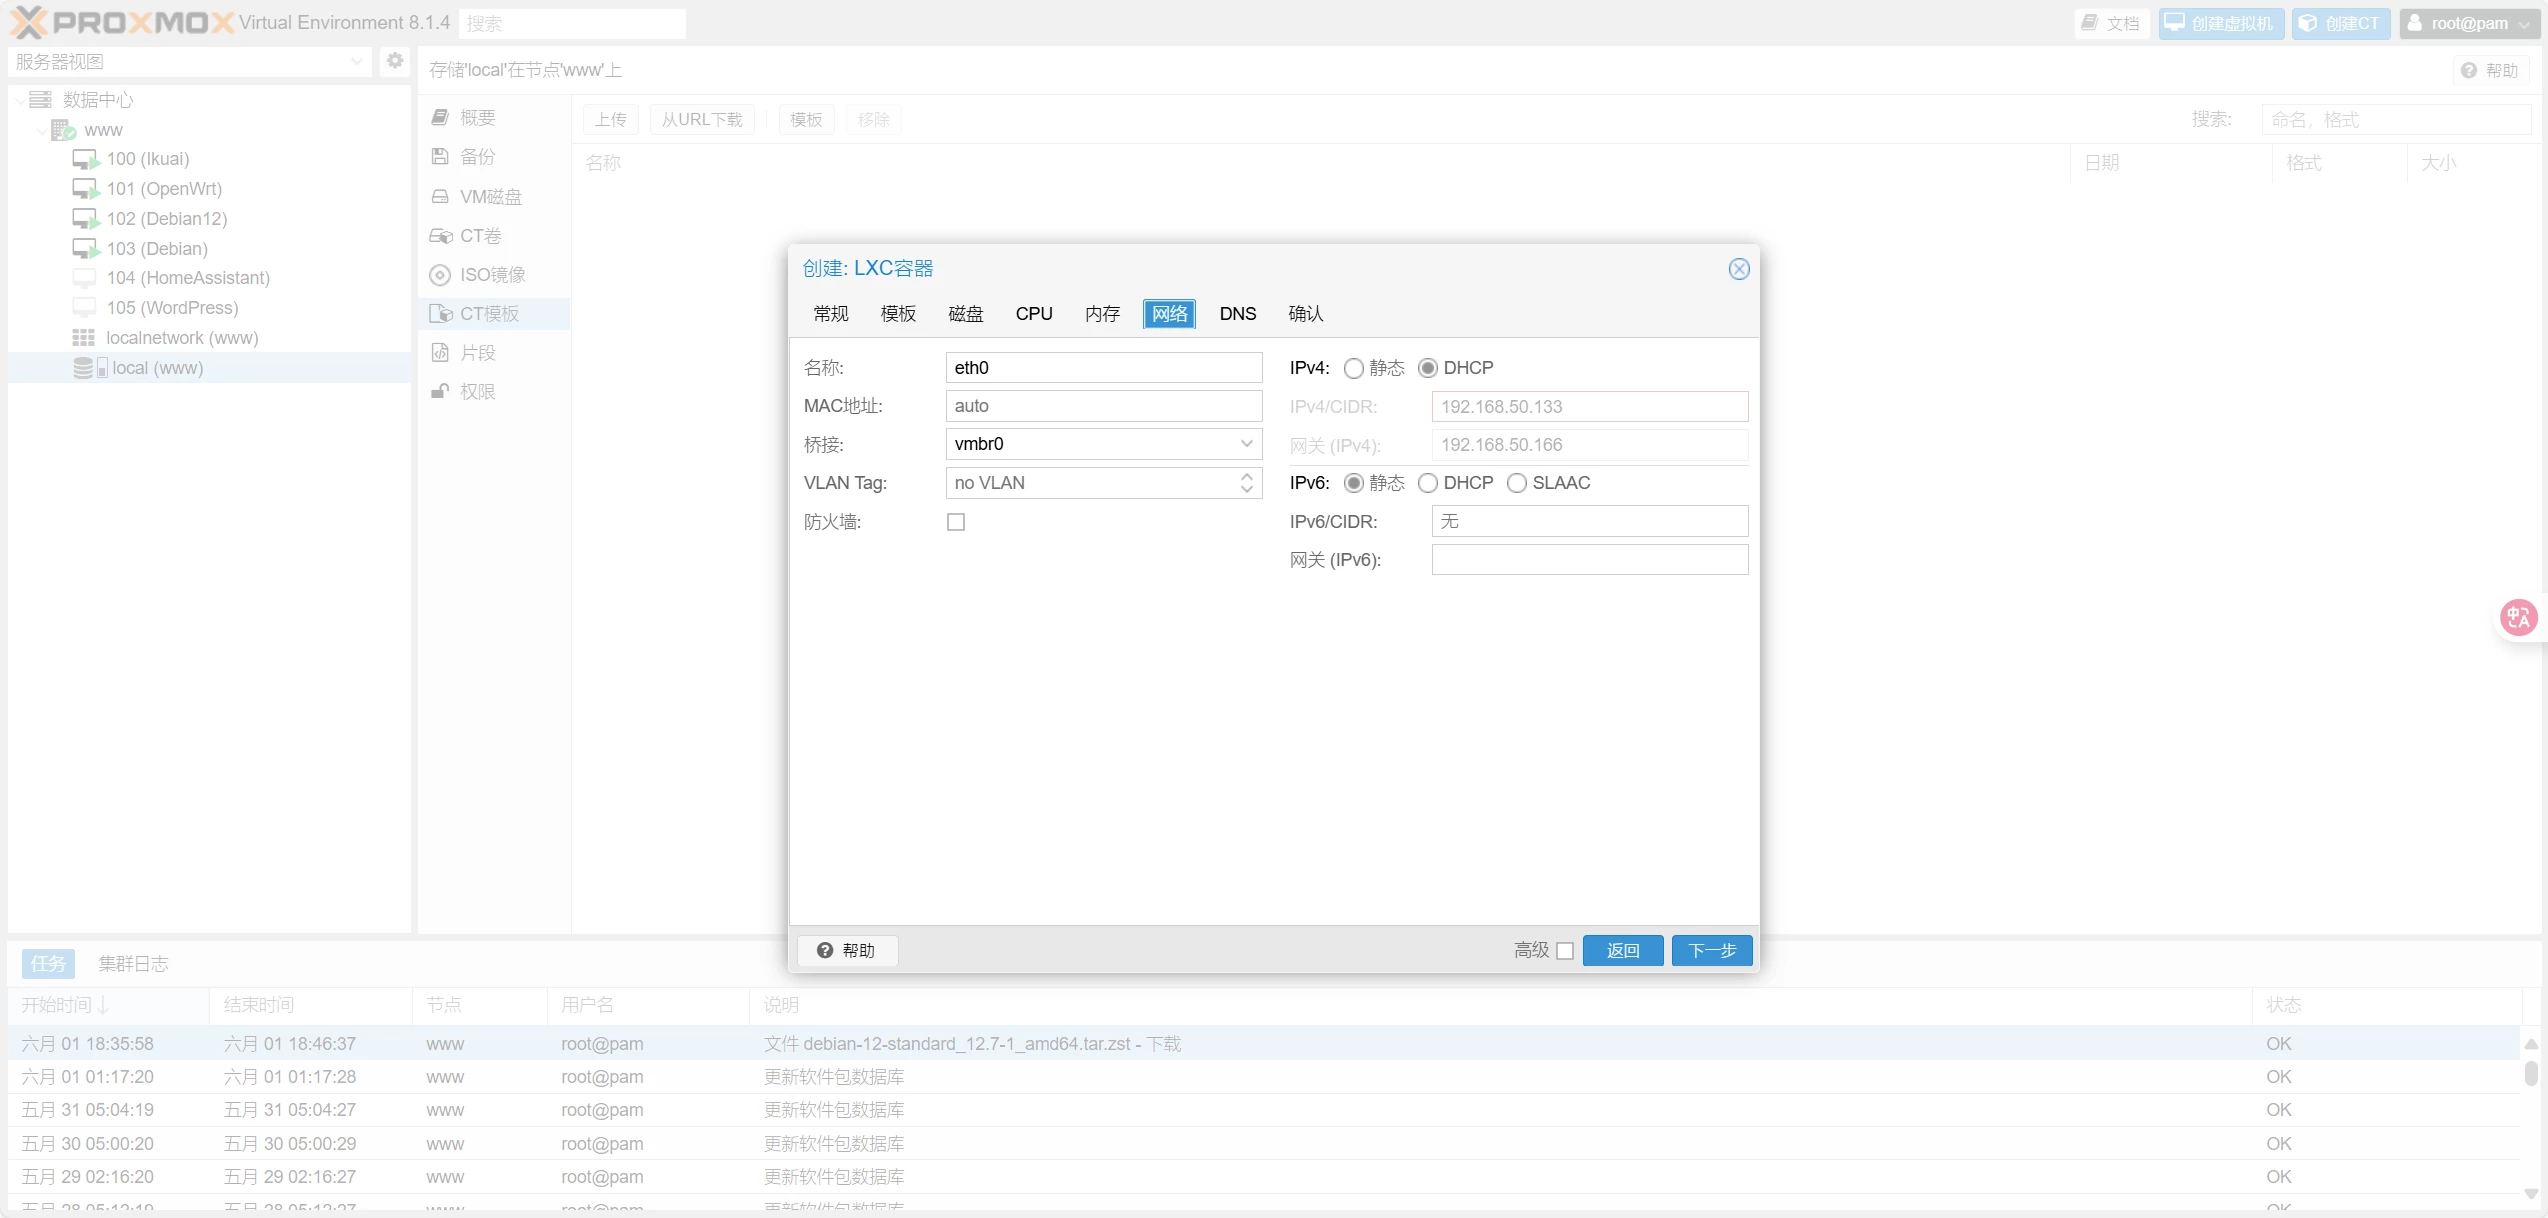
网络选dhcp就可以了,后面可以自己改
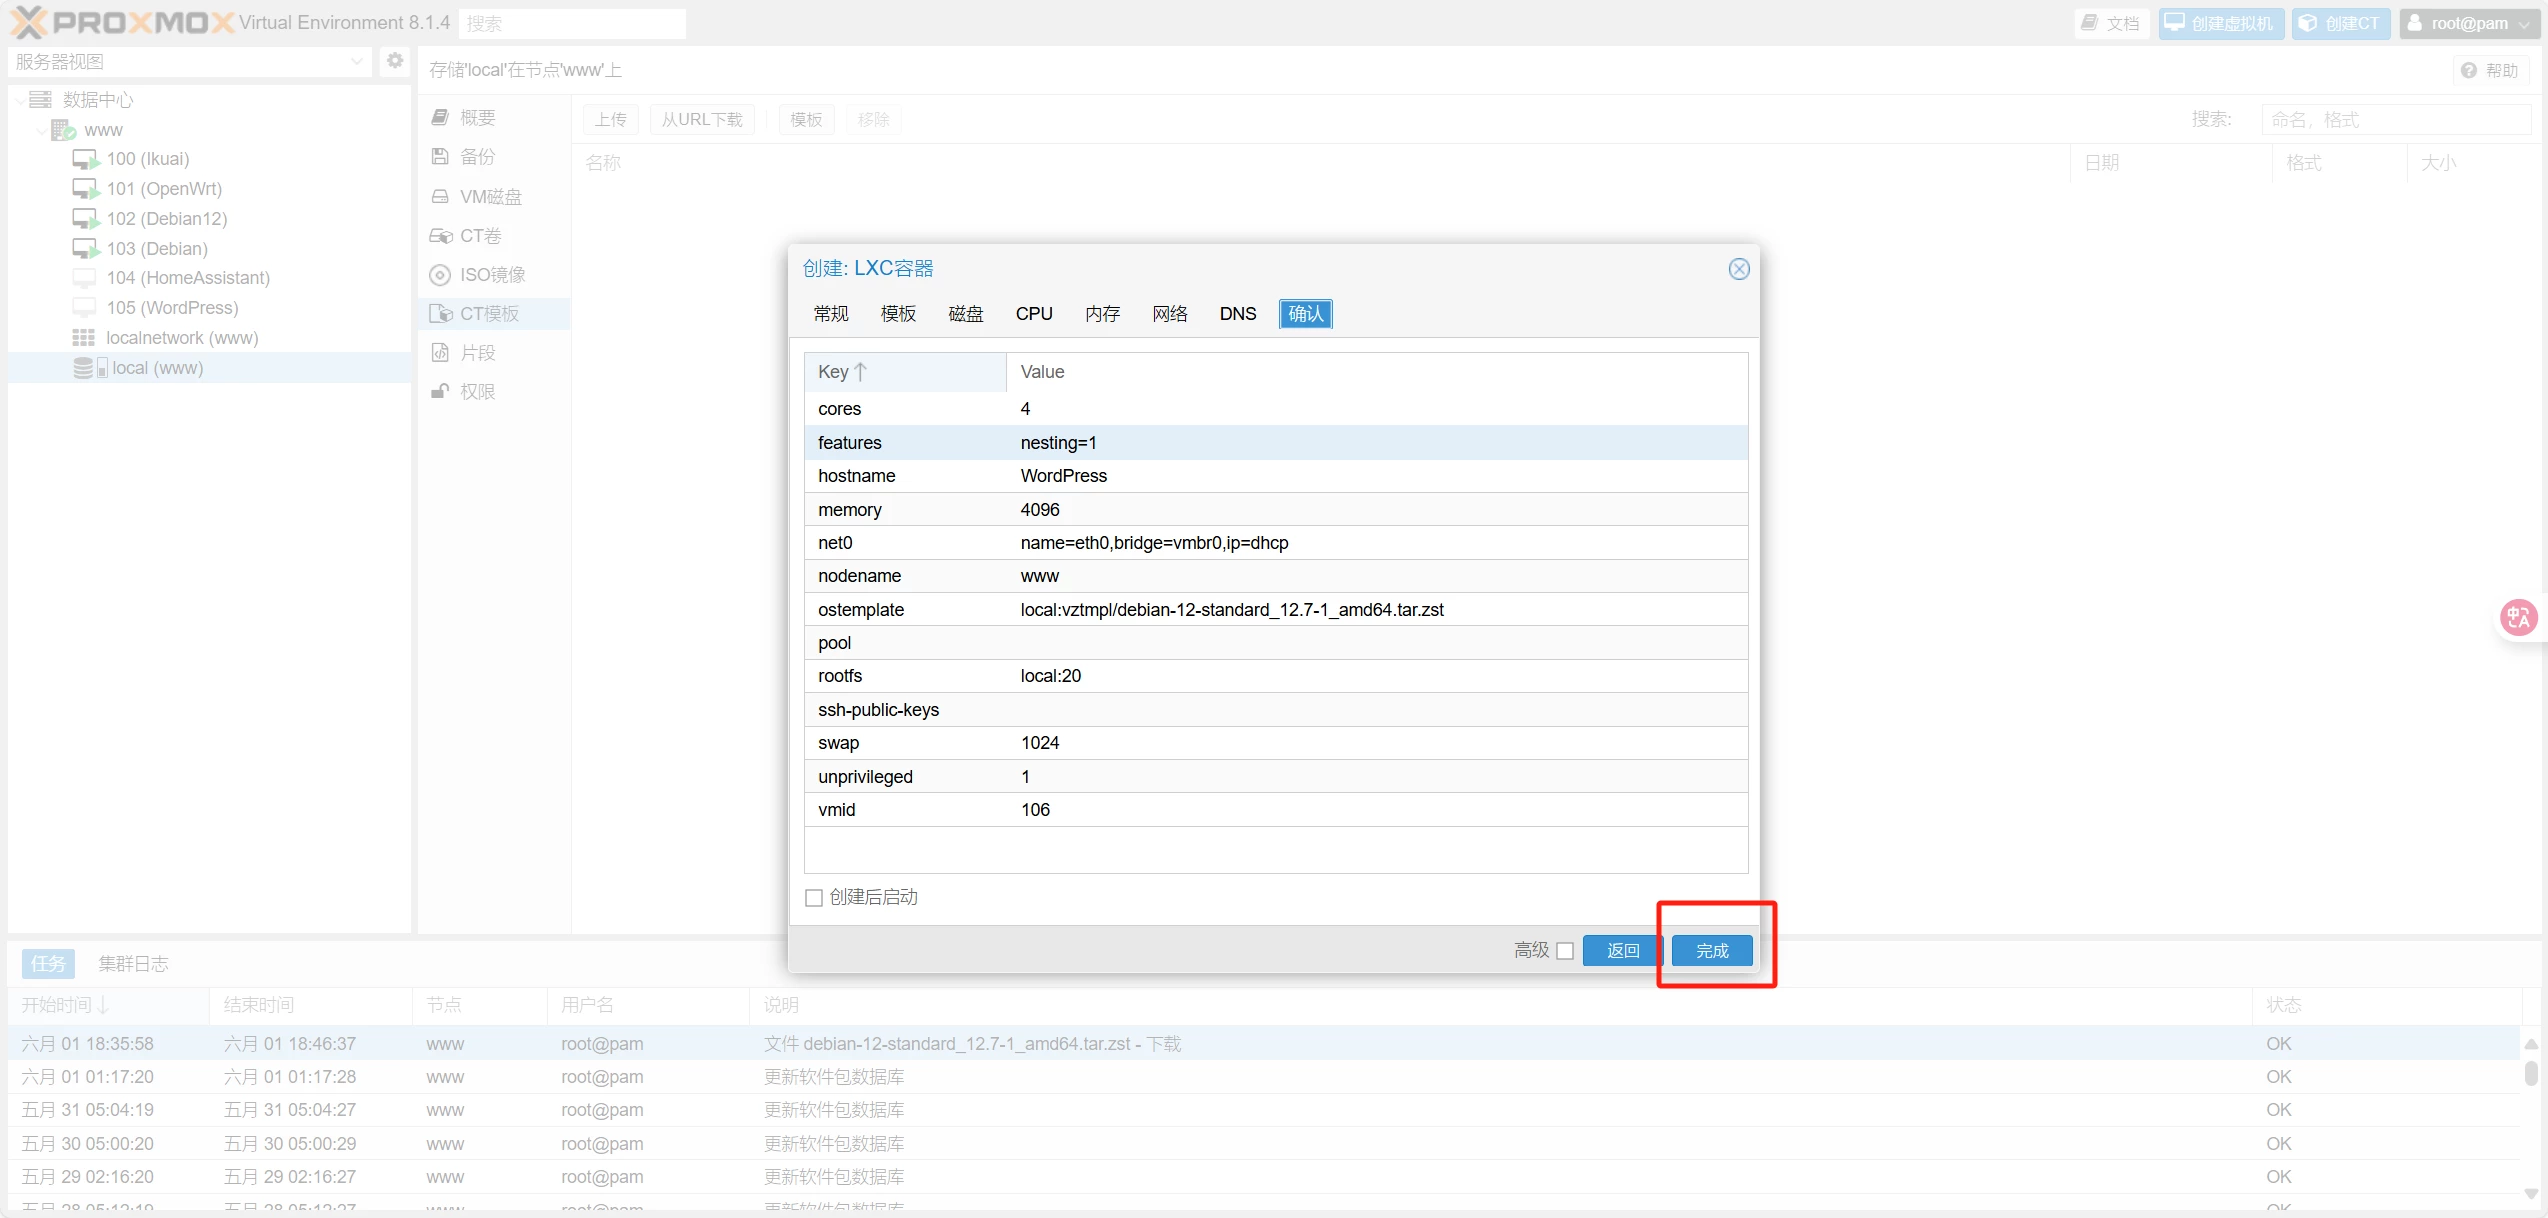
dns默认然后点击完成
做一些必要的设置后重启
sed -i 's/^#Port 22/Port 22/' /etc/ssh/sshd_config
sed -i 's/^#PermitRootLogin/PermitRootLogin/' /etc/ssh/sshd_config
sed -i 's/^#PasswordAuthentication/PasswordAuthentication/' /etc/ssh/sshd_config
sed -i 's/PermitRootLogin prohibit-password/PermitRootLogin yes/g' /etc/ssh/sshd_config
sed -i 's/PasswordAuthentication no/PasswordAuthentication yes/g' /etc/ssh/sshd_config
reboot
一键更换国内(清华源)
cp /etc/apt/sources.list /etc/apt/sources.list.bak && \
echo "备份原有源为 /etc/apt/sources.list.bak"

cat > /etc/apt/sources.list <<EOF
deb https://mirrors.tuna.tsinghua.edu.cn/debian/ bookworm main contrib non-free non-free-firmware
deb-src https://mirrors.tuna.tsinghua.edu.cn/debian/ bookworm main contrib non-free non-free-firmware

deb https://mirrors.tuna.tsinghua.edu.cn/debian-security bookworm-security main contrib non-free non-free-firmware
deb-src https://mirrors.tuna.tsinghua.edu.cn/debian-security bookworm-security main contrib non-free non-free-firmware

deb https://mirrors.tuna.tsinghua.edu.cn/debian/ bookworm-updates main contrib non-free non-free-firmware
deb-src https://mirrors.tuna.tsinghua.edu.cn/debian/ bookworm-updates main contrib non-free non-free-firmware

deb https://mirrors.tuna.tsinghua.edu.cn/debian/ bookworm-backports main contrib non-free non-free-firmware
deb-src https://mirrors.tuna.tsinghua.edu.cn/debian/ bookworm-backports main contrib non-free non-free-firmware
EOF

apt update
安装设置宝塔面板
安装宝塔面板
wget -O install.sh https://download.bt.cn/install/install_lts.sh && bash install.sh ed8484becd
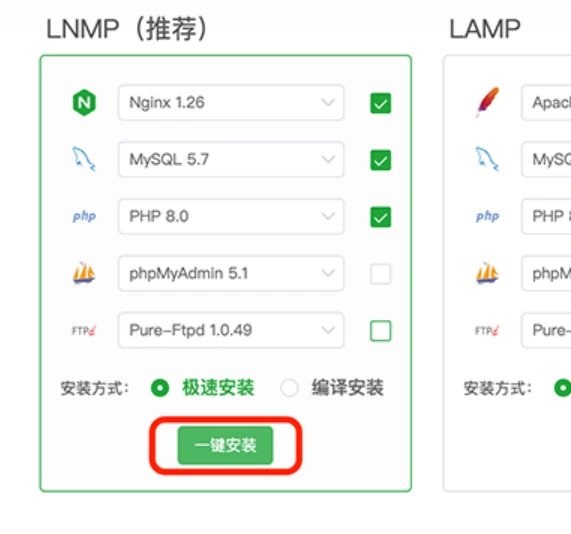
安装基本环境
我们选择 LNMP 安装方式 – 极速安装
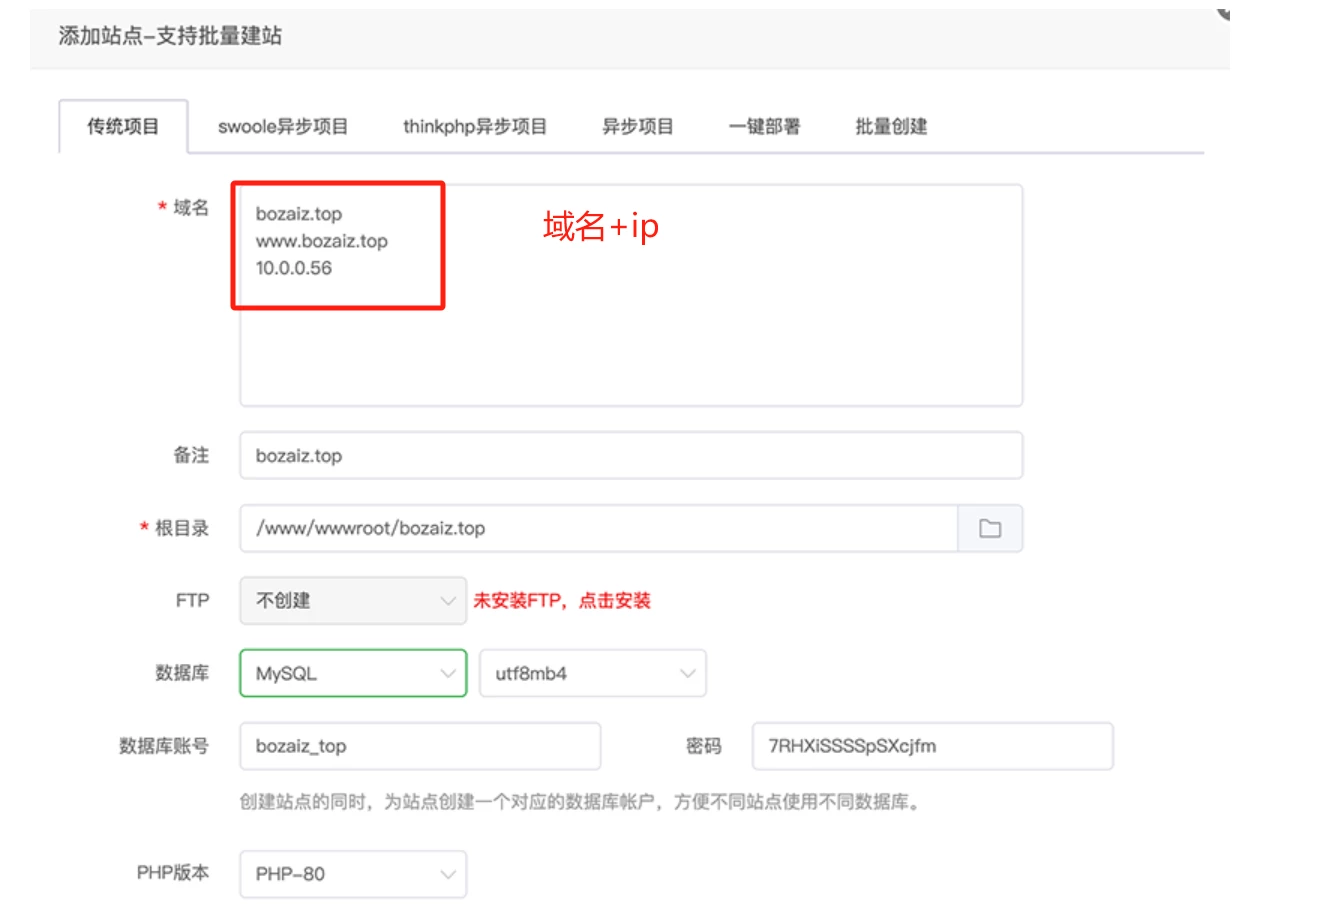
搭建本地博客
注意,域名这里需要填写你的域名,包括宝塔面板的内网 IP 地址。
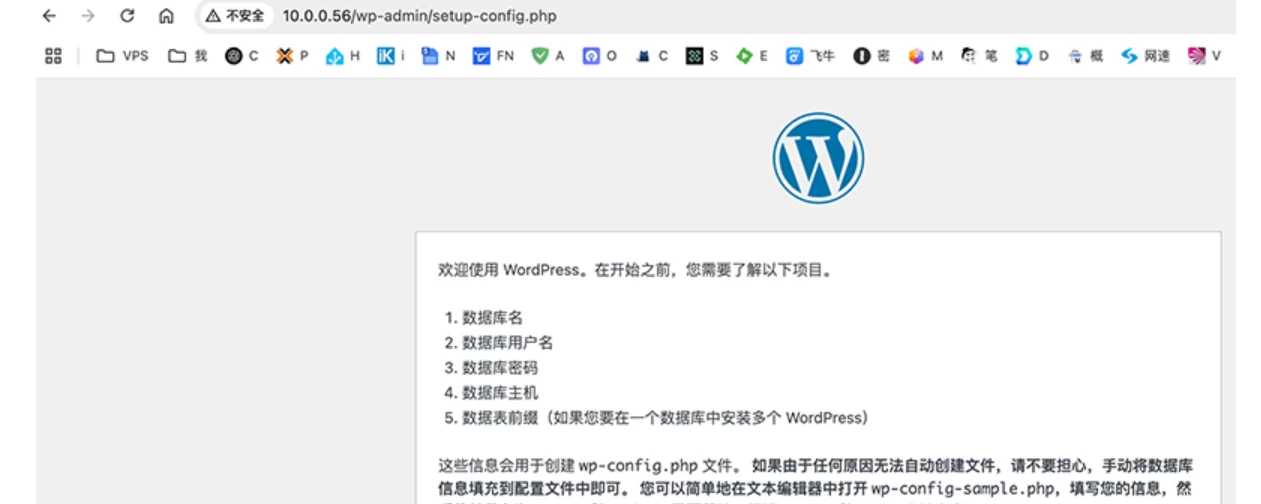
我们使用 WordPress 来创建我们的博客
WordPress 下载地址:点击下载
重要提示:wordpress安装完毕以后,我们不要进行设置(需要等后续配置好以后,再来进行设置)
安装配置 CloudFlare
安装 CloudFlare
wget https://github.com/cloudflare/cloudflared/releases/latest/download/cloudflared-linux-amd64.debdpkg -i cloudflared-linux-amd64.deb
查看cloudflare 版本,显示版本号,证明安装成功
cloudflared --version
CloudFlare 认证
执行登录命令会出现登录地址,复制登录地址用浏览器打开,选择相关域名,授权
cloudflared login
授权后会在 /root/.cloudflared/ 下生成 cert.pem 认证文件

创建 Tunnel
以下命令中的 bozaiz-top 改为你需要的项目名字,推荐使用域名,把 . 改为 -,英文符号
cloudflared tunnel create bozaiz-top

执行成功以后,如上图。会在 /root/.cloudflared 下,生成图中红色的 .json 文件,我们需要对其改名为 bozaiz-top.json (就是项目名字,如bozaiz-top)
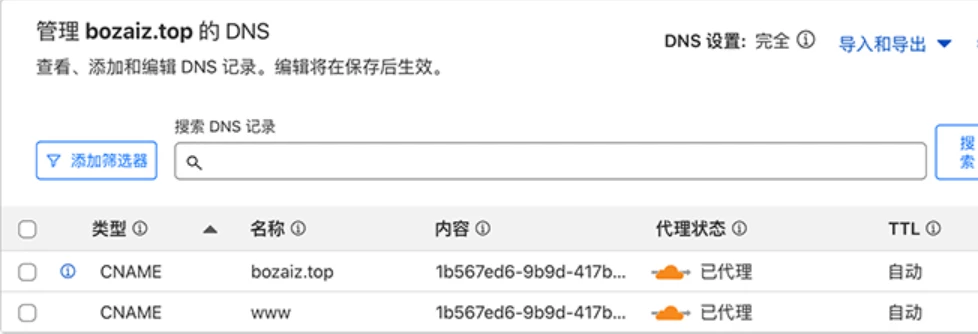
设置 DNS 解析
依次执行下面的命令,创建博客所需域名的解析
命令中的 bozaiz-top ,是刚才创建的 tunnel 的项目名字,请自行修改
cloudflared tunnel route dns bozaiz-top bozaiz.top
cloudflared tunnel route dns bozaiz-top www.bozaiz.top
执行成功以后会提示如上图,并在域名的 DNS 中自动创建相关的 CNAME 解析
配置 ingress 路由
在 /root/.cloudflared 下创建文件: config.yml ,填入以下内容
# tunnel 后面为刚才设置的 Tunnel 的项目名字
# credentials-file 后面为刚才修改的 json 文件绝对路径
# 两个 hostname 后面的域名为你的域名
# 其中的 IP 地址为安装宝塔机器的 IP 地址也就是pve里debian12里的内网地址,端口不能丢

tunnel: bozaiz-top
credentials-file: /root/.cloudflared/bozaiz-top.json

ingress:
  - hostname: www.bozaiz.top
    service: http://10.0.0.56:80
  - hostname: bozaiz.top
    service: http://10.0.0.56:80
  - service: http_status:404
设置 CloudFlare 启动和自启
安装 cloudflared 服务
cloudflared service install
设置cloudflared 开机启动
systemctl enable cloudflared
重新启动cloudflared
systemctl restart cloudflared
启用 HTTPS 强制访问
在cloudflare域名的 SSL/TLS 中,找到边缘证书,开启 始终使用 HTTPS

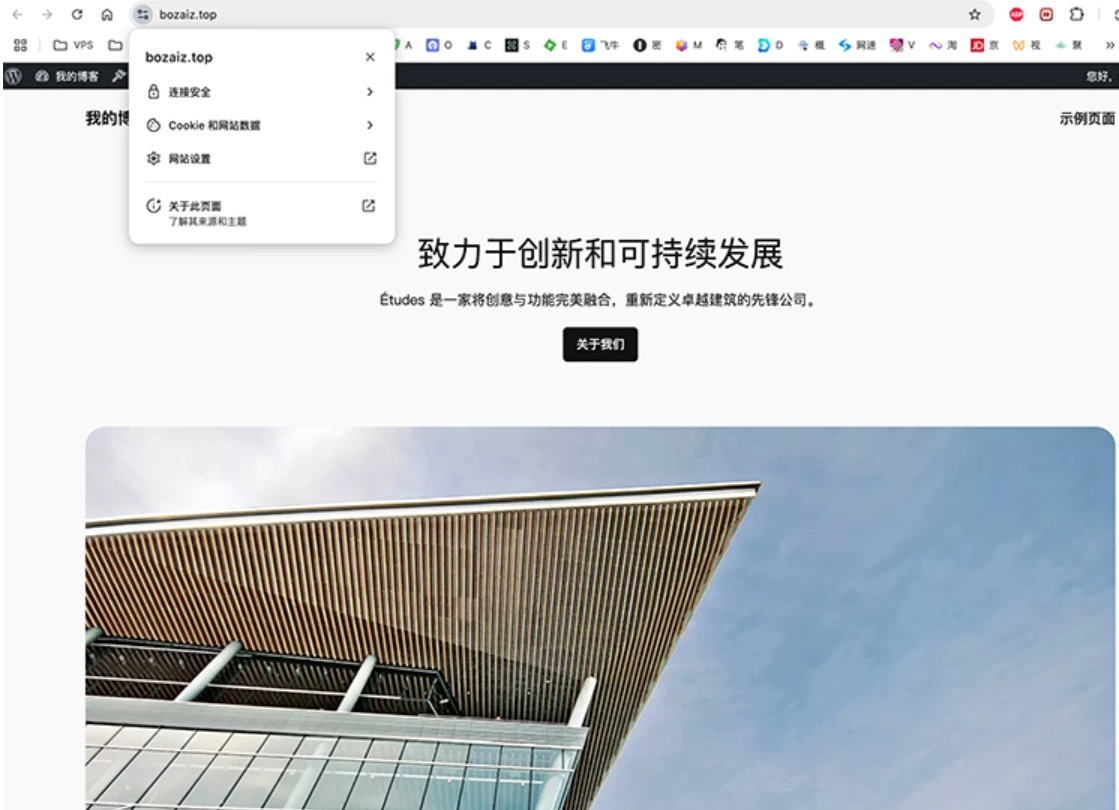
访问并配置博客
现在,我们可以通过我们的域名来访问我们的博客了。
如果需要清除cloudflare的tunnel项目使用命令关闭就可以了
关闭本地的 cloudflared tunnel
systemctl stop cloudflared
查看 Cloudflare Tunnel 列表
cloudflared tunnel list
删除相关的项目 bozaiz-top 为项目名字
cloudflared tunnel delete bozaiz-top
使用cloudflared tunnel会非常慢因为流量经过cloudflare
cloudflared tunnel有docker项目,使用docker项目更简单。